Today, I’m covering some things that make great upgrades to your RV right out of the gate. And if you’ve had an RV for a while, there are some things you may have never considered on this list.

This next upgrade is something everybody should have. Now, I choose Tire Minder. You don’t have to go with the same model I have—you don’t even have to go with Tire Minder. But everyone, please get a TPMS.
A tyre pressure monitoring system (TPMS) is a day-one upgrade. Without one, you don’t know something is going on with your tyre until it’s shredded or you’re fishtailing all over the road. With one, you know immediately, and that may only be a few seconds, but those few seconds can mean the difference between getting off the road safely or getting into an accident.
I don’t know if many RVers understand this is a lighting modification you can do in your RV. It’s not dimmer switches, it has nothing to do with switching out LED bulbs or even changing lighting fixtures, but it does change the entire look of the inside of the RV, and it’s so easy anyone can do it.

Interior LED lights have been standard in RVs. They’re inexpensive to manufacture, super power-efficient, and produce very little heat. One bad thing about LED lights that I hear from a lotmanyle is that they’re super harsh and they e uncomfortably bright.
This is where dimmer switches come into the equation, which has been an extremely popular modification. Dimmers are great; they allow you to adjust the intensity, but you still have that harsh, bright white light.

So, I added lens filters in conjunction with my dimmer switches. This is a very thin film used in the photography industry that goes over the lighting rigs to change the temperature of the light. What I’m using today will take a 5500K temperature down to around 4,000K. 4,000K is similar to the daylight in the early morning and the late afternoon.
You can make this unknown upgrade, and you don’t have to do dimmer switches if you don’t want to. No wiring needs to be done; you don’t have to change any LED bulbs, and all the skills you need to install lens filters you learned in kindergarten.
So, let me show you how to put this stuff in. You’re just going to remove the lens from your interior lights, and you’ll want to cover the area inside the lens where the light shines through with the filter. On my lighting, I cut out a circle for the bottom and then cut out a strip to cover the sides. Then, install the lens back onto the light fixture, and you’re done.
I did not install the lens filter in the bathroom because we don’t mind having much bright white light in here, but I did install it everywhere else inside the RV. The reading lights above our bed were super bright—we never used them. But if I need to use these, I’m probably just waking up, so I don’t want to be instantly blinded. So, I added two layers of filters to these lights.
If you want to turn your RV into a disco, there are different colours and shades, but I used a 1/2 CTO, also known as a 1/2 colour temperature orange. 1/2 CTO is subtle enough to not necessarily reduce the amount of light you’re getting all that much, but it does change the temperature.
This is a personal preference upgrade, but it does make the inside of the RV feel much warmer, and it’s a great modification to do if you already have or don’t want to install dimmer switches. I’ll put links to the lens filter I used, along with all the other products in this video, down below in the video description and the first pinned comment if you want to check them out. I’ll also link our dimmer switch video below if you want to check that out.
Oh, and one more thing—it won’t catch on fire. These lens filters are designed to be next to LED lights. I’ve had these filters in my lights for probably five years now.
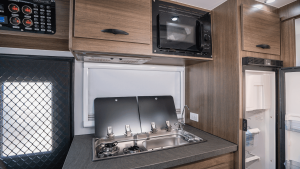
Not only is space in an RV limited—no matter how big your RV is—but the space you do have sometimes isn’t the easiest to access. I have this cabinet above my sink, and it extends so far back that it’s so inconvenient. You almost have to pull everything out of the front before removing anything from the back.
And that was the same issue with our pantry—these things go back far. So, I installed these stainless steel slide-out racks to make accessing everything we want much easier.
These slide-out drawers come in many different sizes, so measure. Also, ensure you measure at the smallest spot, usually the front at the opening.
Sometimes, the ridiculous things—like slide-out drawers we’re so used to in our house—make RV life much more enjoyable.
So, you spend all this money on an RV, and the mattress that comes from the factory is just awful. I’ve heard many people ask the manufacturers not even to include it.
Before you do anything, measure:
- The length, width, and height of your mattress
- The same measurements of where the mattress fits
You can sometimes fit a larger mattress in the area because the factory mattress is small.
And listen, there are many choices for mattresses.
This upgrade makes my list for two reasons. Number one, the showerhead we got with the RV from the factory was awful. The pressure was terrible. I threw that away a long time before I even started this channel. And reason number two, back when we started camping, we stayed at a few campgrounds that didn’t have water connections, so we filled up our tank. We needed it to last three or four days before leaving the campground, which wasn’t happening.
You had this awkward lever to turn off the water and couldn’t do it easily with one hand. So I did some research, and I found the Oxygenics shower heads and their selling point was increased water pressure with less water volume. I don’t even know how that’s possible. These things have a turbine that mixes air with the water and increases the water pressure.
Some of you may like the wider spread you get from the shower heads many people have in their houses, and Oxygenics also makes those. But I like this showerhead. I like the pressure that you get from the nozzle. It’s also got this button on the side that’s easy to press with one hand. When applying soap or shampoo, it drastically slows the water flow down to conserve water.
And because it doesn’t completely stop the water flow, you don’t get that burst of hot water when you turn the water back on. This is a day-one upgrade if you enjoy your showers and want to conserve water.
This next upgrade is huge, especially if you travel with pets. It’s the MicroAir EasyTouch RV Thermostat. This is a smart thermostat so that you can monitor and control the thermostat right from your phone via Bluetooth or through an internet connection.
It will also send you alerts, so if you’re out for the day and the temperature inside goes outside your chosen range, you’ll get a notification on your phone. And while remote access is great, you don’t need to be one of those RVers with a dedicated internet line inside your RV to use this thermostat’s features.
Someone in your party can connect the thermostat to their cell phone’s hotspot. You would leave that cell phone behind when you go out. Then, you would control or monitor the thermostat from another phone.
What many people don’t know about this thermostat is that you can also set schedules to have the air conditioning or the heat turned on at specific times on specific days. It will also allow you to set a range, which the thermostat in my house doesn’t even do.
And you can customize this. So, for example, if the temperature goes above 70°F, the air conditioning will turn on. If the temperature goes below 55°F, the heat will turn on. Keeping your temperature regulated will help you save money on propane or electricity if you pay for your electric usage.
Our floor plan only offered one seating arrangement during the year that we bought it. After one trip, we knew we needed to get rid of it. It was uncomfortable. The other issue, and probably even more prevalent than being uncomfortable, was the cracking and peeling that was so common among RV furniture.
I’ve seen countless posts online—people battling with the manufacturer only a year or two after they bought the RV because their furniture was failing. So many of you will upgrade your furniture because it’s uncomfortable or falling apart.
The point is that you do not need to replace your RV furniture with RV-branded furniture.RV furniture is just way overpriced. Now, take-home furniture stores—they’re everywhere. They’re a dime a dozen, so you’ll find much better prices for comparable products. I got this loveseat at a home furniture store. I paid $579 or $599—I can’t remember; it was a while back. You could not find a loveseat manufactured by an RV furniture company for anywhere near that price.
It’s held up perfectly for seven years—lots of puppy feet, spilt drinks, no cracking or peeling, and the framing easily handles travelling down the highway at 65 mph.
So, if you need to replace furniture in your RV, measure out the area you need it to go into and at least check into the options at a home furniture store. You’ll be surprised how much the price differences are; it will hold up perfectly fine in your RV.
Also, all furniture comes apart so you can get a large piece through a small RV door. I got this couch in our RV by just removing the backs.
Upgrading your RV doesn’t have to be complicated or expensive. From essential safety additions like a TPMS to comfort-focused tweaks like warmer LED lighting or a smart thermostat, these modifications enhance functionality and livability. Whether you’re a new RVer or a seasoned traveler, these upgrades—like slide-out storage, water-saving showerheads, or home furniture replacements—make life on the road safer, more efficient, and more enjoyable. Prioritize what matters most to your lifestyle and start transforming your RV into a cozy, modern home-on-wheels.